Getting started with Groups
Make shared accounts to collaborate with other people.
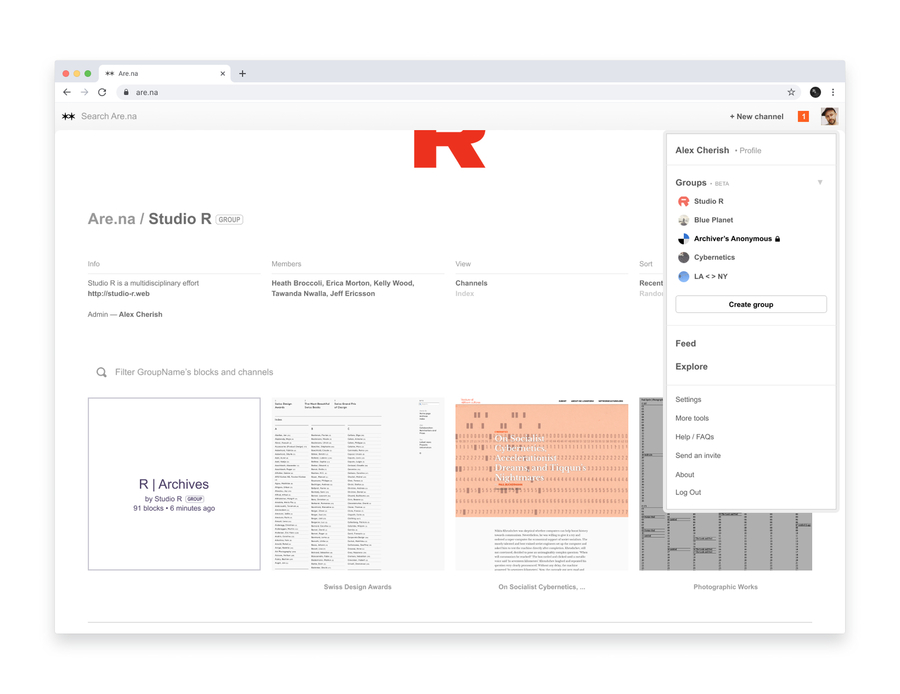
Groups have their own profiles and channels
Every group has a profile page where you can see all your shared content in one place.
To add group members:
- 1. Click + New group in the main dropdown menu.
- 2. Name your group, choose a privacy setting, and add members.
- 3. Add an avatar for style points.
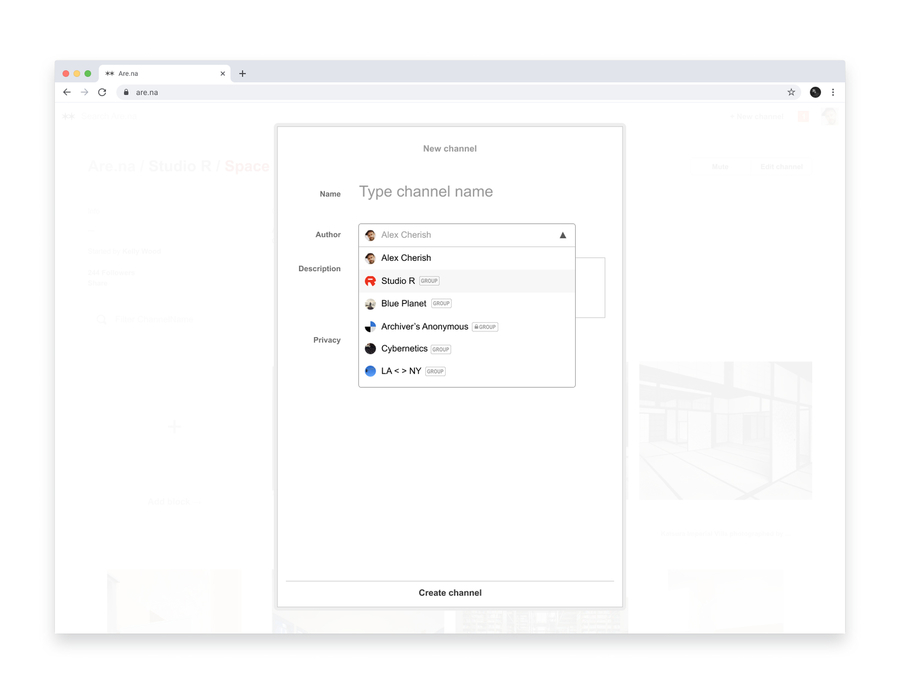
To create a group channel:
- 1. Once you’ve made your group, click on + New channel.
- 2. Under channel author, select the preferred group.
- 3. Create your channel.
Groups let you collaborate with a click.
Quickly add your whole team to new channels. Keep work and personal content separate.
To add group members:
- 1. Go to your group and click the settings button on the right.
- 2. Under manage members, search for members to invite or enter an email address.
To collaborate with a group:
Click add collaborators at the top of any channel and enter the name of the group.
Group admins can upgrade members to Premium
Billing is simple for professional teams. Invite members and upgrade as you go.
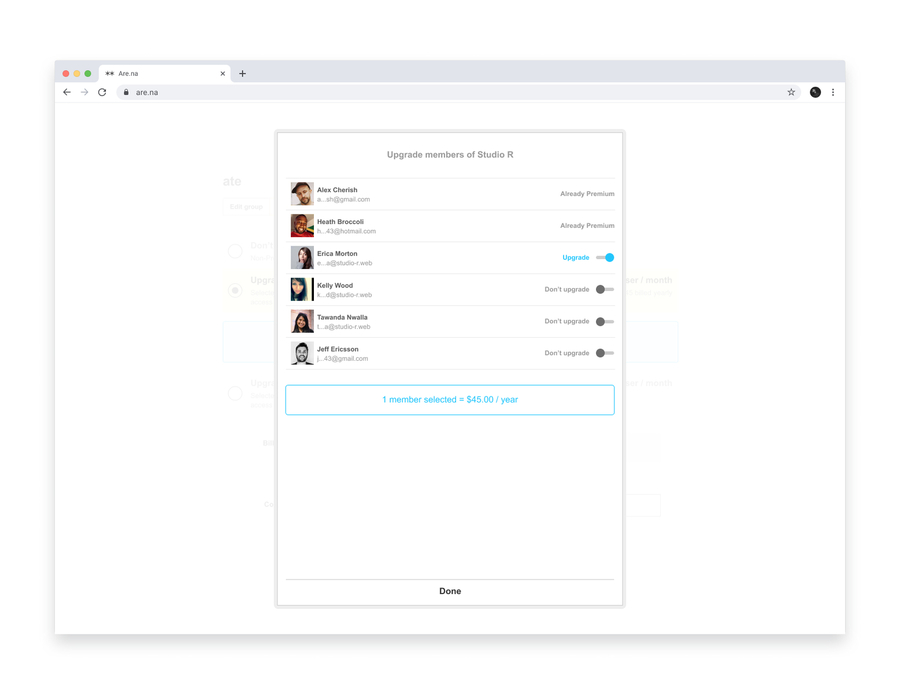
To upgrade members:
- 1. Click on the group name in the main menu.
- 2. Under manage members, click Upgrade members
- 3. Select members and enter your card information.
Get 25% off Premium when you upgrade group members
Join NowMore Features
Learn more about group features, privacy settings, and transferring existing channels.
Groups FAQs